Showing posts with label C. TV Advertising. Show all posts
Showing posts with label C. TV Advertising. Show all posts
Monday, 9 February 2015

The Development and Principles of Editing
My chosen clip is from the movie ‘Now You See Me’ and it is 5 minutes and 39 seconds long. This movie was released on May the 31st of 2013, and was filmed on 100% digital cameras. The story line for the movie is that four very gifted magicians - J. Daniel "Danny" Atlas, Merritt McKinney, Henley Reeves, and Jack Wilder - are brought together by an unknown benefactor and, one year later, are performing in Las Vegas as "The Four Horsemen," who are being sponsored by a man called Arthur Tressler.

For the finale of their first show, they declare they are going to be robbing a bank, and invite an audience member Étienne Forcier, who chooses the bake called Crédit Républicain de Paris. Forcier is apparently teleported to his bank in France, where he activates an air duct that vacuums up the money and showers it onto the Las Vegas crowd. Upon the discovery that the money really is missing from the bank vault, an FBI agent Dylan Rhodes is called to investigate the theft and is partnered with Interpol agent Alma Dray.
Combining shots into sequence
The Combining shots into their sequences is the process of putting all of the shots together and making them flow as one, only once all of the shots have been individually filmed. This movie has been filmed on all
digital cameras. If this movie had been filmed on film cameras I don’t believe
that there would be as many effects as what there are in the finished movie. Using
the digital camera to make the movie has helped to create it even more magical. If this movie has used splicing it will not
have been as successful as what it is now. I believe it would have taken a lot more
time to get the effects that the creators of the movie were hoping for.
Transitions
Transitions can be an instant start to the next scene or image changing. this can be done with a fade, fade to black, dissolve, pan from one person to another, or any other digital effect. This is when the joining of the clips is the transition from one to the other. For this scene that I have chosen there is not any dissolves, fades or wipes to get to each shot. However this clip has been filled with really quick cuts that enable the audience to keep up with all of the action that is happening. Each clip before the cut to the next clip is around 4-6 seconds long each. Having the transitions occurring so fast and so often is able to show the audience how fast this action or chase is going to be.
Visual
Continuity
At 5.12 there is an establishing shot. This is usually the first shot of a new scene, that is designed to show the audience where the action is going to be taking place, which is usually taken with a wide shot. In this clip here is showing the destruction that the action has now caused and helping the audience see the bigger picture to how fast and negative the chase had ended.

The Clip that I have chosen doesn’t show a 180 degree rule so I have found another one from a different clip. 180-degree rule is a guideline between a character and another character or object within a scene. The axis connects the characters, the first character is always frame right of the second character, who is then always frame left of the first and it then turns around the other way once the camera has crossed the axis. At 1.39 there is a 180 degree rule. This here shows the viewer what the characters are able to see when inside and outside of the room.
Video … https://www.youtube.com/watch?v=Ab5MA6PNN5s


At 1.20 there is a shot-reverse-shot. This technique is where the camera takes it in turns to face the characters who are currently talking, in this scene it is Dylan Rhodes and Alma Dray. It will change each time from starting over one characters shoulder looking at the other character facial expression while talking and to then swap it around. In this extract it helps to keep the audience to keep up to speed with who is talking and how there facial expressions are changing with each sentence that the character are saying to one another.


At 4.06 there is a match cuts on action. This technique is used by the editor who cuts parts of the film from one shot to another view that matches that first shots action. This helps carry the viewer along with the action with using a few shots in different views looking at the same action. In this extract it helps us to see the seriousness of the car crashing from two prospective.


At 5.01 there is some motivated editing with an eye line match-cut. This is where a cut between two shots where the first shot that are showing a person looking out of the frame and then on the second shot it is then showing what they were looking at. At this time in the clip there are three characters that are stood in front of a car looking forward out of the frame. The next shot at 5.05 is of a car upside down on the road that is burning in flames. This shot has made it appear that it is a point of view of one of the characters from the shot before, as they are watching from a distance as the car explodes.

Identification
The screen time is the amount of time that has been allocated to each actor while on screen. In this clip that I have chosen the most screen time in going towards the FBI agent Dylan Rhodes who is at the heart of the chase. This helps the audience to keep up with one of the detectives that are on the case showing how much work he is having to do, in order to be able to catch Jack Wilder
A close up is where a photograph or film image taken are at a close range and showing the subject on a large scale. The way that the close ups have been used in this clip is a way of showing the expressions on the characters faces to the audience. This is in the attempt to help them see how on edge the chase is.
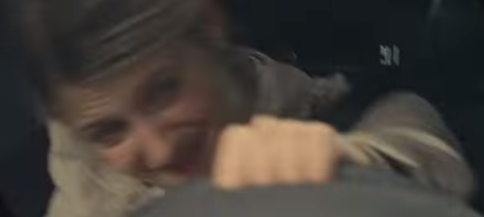


A reaction shot is of a portrayal of a person's response to an event or to a statement made by another character. At 4.29 there is a reaction shot. This is where the agent that has been told to “Get back” then slows down running and then gets back. Having this type of reaction here helps to convince the audience even more of the danger of what could happen with the possibility of the car exploding.

Generating the appropriate involvement in the storyline, pace, tension and suspense.
This whole clip that I have chosen has a really fast pace, and a fair amount of tension and suspense that has been built up throughout the clip.
Shot variation is the technique used in filming to create the movie to be more interesting and dynamic and by using this technique in the editing process it keeps the audiences attention. At 3.58 the sound from the clip becomes to sound like some really serious crashing. This has been enhanced with several different sound effects to keep the audience paying close attention to this scene.

A montage is the technique of selecting, editing, and piecing together separate sections of film to form a continuous whole. However in this scene there is no montage, so I had looked elsewhere for another montage. However this final scene from Saw II Shows a collage to the audience that helps them to fully understand where this character had gone wrong with flash backs, and who was truly behind it all. The extract is completing the narrative puzzle to fully understanding the whole movie and the one before this.
Video ... http://youtu.be/7Qz9HGWdhX4
Providing and withholding information is when you try making something more dramatic by giving the audience more information or taking away information. With the clip that I have chosen most of the information that the audience is going to need is all there, making it easy for them to understand what is happening and why from 0.00 all the way until 3.55. The rest of the clip past this point will cause the audience to question how and why this event had happened, and why it happened so fast.

A jump cut is an abrupt and a rather fast transition from one scene to another. At 1.44 there is a jump cut that appears to look as if it was an editing mistake but might not be. This may not be a mistake is the way that the audience is meant to see exactly how stressed this character is while exiting the building. Or on the other hand maybe it was a mistake with the first shot having seven actors and actresses and the second shot having six actors and actresses.
Video ... http://youtu.be/7Qz9HGWdhX4
Providing and withholding information is when you try making something more dramatic by giving the audience more information or taking away information. With the clip that I have chosen most of the information that the audience is going to need is all there, making it easy for them to understand what is happening and why from 0.00 all the way until 3.55. The rest of the clip past this point will cause the audience to question how and why this event had happened, and why it happened so fast.
A jump cut is an abrupt and a rather fast transition from one scene to another. At 1.44 there is a jump cut that appears to look as if it was an editing mistake but might not be. This may not be a mistake is the way that the audience is meant to see exactly how stressed this character is while exiting the building. Or on the other hand maybe it was a mistake with the first shot having seven actors and actresses and the second shot having six actors and actresses.


Parallel editing is a technique that is used by cutting between two or more related actions occurring at the same time in two separate locations or different points in time. However my chosen clip doesn’t have any scenes where it is happening, so I searched for another piece. And this is one I had found from the movie Inception, here there are three different locations with the same characters but all with the same consequences that each dream has. This helps the audience to understand how each thing that is happening will be happening else were in a deeper part of another dream which will be a completely different location but at the same timing.
Video … http://youtu.be/i6XkEEzjVFA

The cutting to soundtrack editing is when the pace and beat of the song determine how fact scenes can be cut. At 1.52 in this clip the music and beat speeds up with fast beating drums. The reason for this is to be able to get the audience pumping and excited for the thrill of the car chase. This helps the audience when the chase is slowing down and speeding up. With the faster drum beats in the music the shorter and faster the cuts are, however the slower the drum beats are the longer and slower the cuts are going to be. At 4.05 they drums and the music have stopped, leaving the audience to just take in what is now happening with the sound effects.
Editing rhythm is the editing that is used to keep up the pace of a movie to then match the action that is going on within the film itself. Slow cuts to the edits have a calming feel, but on the other hand faster cuts give a livelier feel to the movie. For this clip up until 4.59 are rather fast cuts which help to add to the audience’s tension for the movie, to build the suspense to see how the character could use magic to escape the situation. After 4.59 the cuts have slowed right down, this isn’t giving a calming feeling but a sense of regret. Doing this with the movie, will help the audience to understand how shocked the characters are just as well as the audience itself.
A cutaway in a movie is when a shot is continuously filming action by then inserting a view of something else. This is usually used when the editor wishes to avoid using a jump cut. This one that I have found on my chosen clip is at 0.14 to 0.19, and it has been used in the way that the audience is able to see what the character is looking at, before we see the character again. In this extract is helping the audience to perhaps thing exactly that the charter is thinking of doing.
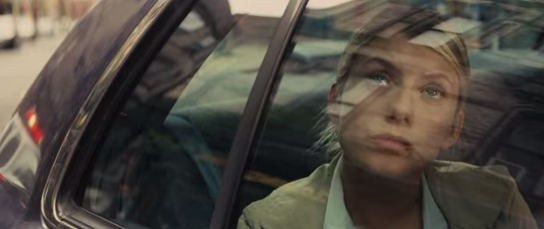


A multiple point of view shot is a scene in a film that shows the audience characters that are looking at something out of the frame, to then have the camera representing what the characters where looking at. At 1.19 the point of view shot is shown, but in a slightly different form. The first shot shows the audience a character that is holding a camera out of the window with them both looking in the same direction. In the next shot it then shows what this character and camera are both looking at.
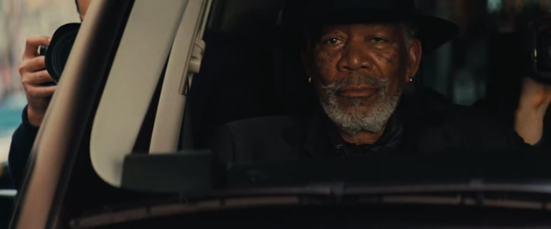

The construction of the time and space of a story is when filming a sequence where a character is to be traveling from point A to point B and may want to make the traveling faster than what is by shortening the journey. By focusing on just the one character, we are able to see how it has worked. At 1.51 we see the characters we are focusing on, getting in to the driver seat of a police car. The scenes then cut to a few other characters within this chase, after this we see a quick shot of the bridge that all of the action is heading towards. And then at 2.59 we see this character again but now already on the bridge to have almost have caught up with the ‘suspect’.


Tuesday, 3 February 2015
Monday, 2 February 2015
TV Advert Final Evaluation
1. The brief
A. The brief was to pick one brand from all of the Unilever
products to then create a product for a new target
audience, which means we would have to create a new advert that will
appeal to this type of audience. After this was completed we then had to start
thinking about the re-selling of the advert and create and plan it
out.

B. The chosen product from the group was in fact my Marmite
idea. The reason for choosing this one is because it was easily suited to our
budget, there was not many to the cast that we were going to need and the
locations were close meaning that there wasn’t any traveling costs from the
members of the team. We had three options to choose from.
The first was Bovril; the idea for this one was to get the Bovril
aimed to the younger generation of kids that are still in preschool. The reason
we didn’t choose this one is because the budget would not have been big enough to
dress up 20 school kids in suits for the advert.
The next was Viennetta, and the idea for this advert was to
reshape the desert into a caterpillar and aim the new product out of the reach
of the high class and down to the lower class and young children. The reason
behind not choosing this one had to gather a cast of young children and none of
us really know any that we might have been able to have used.
The third idea was Marmite, for this advert the idea was to
get the product to follow a teenager around on their everyday routines, just
lingering around until this character has no choice but to give the drink a
try, and then finding that they really like it.

C. The current target audience of the Marmite product is to
anyone at the age of 30 and above. This is because these ages’ people are new
parents, and the advert is trying to get the parents to buy the product to give
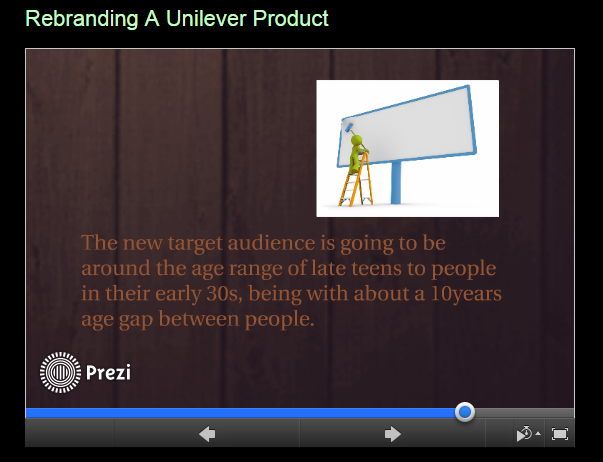
it to their children to try. The new target audience for the advert is around
the age range of late teens to people in their early 30s, being with about a 10
year age gap between these people. I chose this age group and the working class
people as the target audience for the advert because I believe it’s not high
quality enough for the upper class or the older generation of people. But I do
also believe that it will appeal to the young and the quirky, with it standing
out and being different, just how the younger generation like to be.
2. The finished product and feedback
A. I had then started to collect feedback from the public on
how they perceived the Marmite advert. I had logged on to Survey monkey and
then created my own questionnaire with 10 questions about the advert. I had
asked for feedback about the advert I had created. This one is the feedback on what could be improved.

B. In the preproduction I had specified that I wanted the
new target audience to be towards people in their late teens to people in their
early 30s...
The graph here from my survey questionnaire, is showing that
the 9 people have said that they believe the Marmite advert is aimed at the
same age group as I had planned it out to be. Some of the other views where
that the advert could have been aimed at any age group, this isn’t what I was
aiming for but if people believe that then the sales for the product would
increase.
C. About the technical and aesthetic quality side of the
advert, the results say that the advert has been made well, however there where
a few draw backs such as; the voice of the marmite could have been a little
louder, the music could have been a little more upbeat, the camera could have
been a little more steady in one of the places and the writing for the slogan
could have been up for a little long than it was.

The mise-en-scene for the advert was meant to be having more
location scenes than what the original advert did have in the end. In total
there was going to be 4 different locations. However we had found that the
advert would be going on for far too long to be an advert, therefore we have to
cut some of the scenes out but keeping the same idea for the advert but
altogether only now having 2 scenes.
The camera skills for the advert were doing well up until
the character had gone to the fridge in the office scene. That part was meant
to be a little shaky but viewers felt that perhaps it was an accident and felt
it was out of place, compared to the rest of the advert.

The editing side of the advert could have been used to cut
down on the transitions. Some of the views from the class had commented saying
that there are a little to many on the fade in and outs. However the sound for
the advert could be improved. The Marmite speaking voice and having louder and
catchier music would have improved the advert.

D. The effectiveness of the finished advert, I believe sells
the product to the specified audience through its narrative. From the results
of the survey everyone knows what the advert is selling which means that the
advert was clear in that sense to get the product across to the customer. They have
also determined that the target gender audience is of both male and female,
with the exception of one or two other people who have said that it could have
been towards the single male or the single female. This is showing how the
Advert was mostly successful in the target audience that it had been originally
aimed towards. Also the age that people had thought the advert was aimed to be
successful to the plan, other than a few other people that said that the target
audience age could have been any type of age.

E. The persuasion technique that was used in the advert was
for the Marmite to be following the character around in his everyday routines.
The idea was to have the character eventually have no choice but to just give
the drink a try from being, tired and thirsty. Then the slogan pops up saying
“you just marmite like it!” I feel that if the advert could have been a little
longer then the narrative of the advert would have been even stronger.

F. The message the
advert was trying to send to the target audience was that having marmite on
toast isn’t just weird, that maybe it does smell different and not to people
liking, but people can just turn away products because of the smell or look,
they should at least give it a try and they might just like it at the end of
the day. That’s where the idea of the slogan had come from. The main technique
that was used to show the message was the main character trying the drink and
then really like it, to then offer it to another staff member who then really doesn’t
like it. But at the end of the advert they had both tried it. I want the audience
to think that it’s such a horrible disgusting idea but have the urge to want to
try it and see for themselves if it really does taste the same way it looks.

G. I do feel that the advert fits its purpose rather well,
but there are a few things that could be a little different to improve the
advert as a whole. Professionally the
camera movement could have been a little steadier in dome parts and the sound
and music could have been a little clearer and louder for the audience to hear.
It also complies really well with the advertising
regulations that had been predicted,


3.12. This is where the advertisement is not misleading by
exaggerating the capability or performance of the product. This is how the
marmite product has been kept the same, loving it or hating the product.
4.1 That the advertisement does not contain anything that
could cause physical, mental, moral or social harm to persons under the age of
18.
4.2 This is where the advertisement must not cause serious
or widespread offence against generally accepted moral, social or cultural
standards.
I had to make sure that the advert was kept to these codes because
of the previous adverts reactions from the public.

3. Personal reflection
A. The final advert compared to the original intentions are
quite different, we had cut the scenes down, in order to fit the duration of
the advert to one minute. The storyboard and shot list where followed along
really well up until we found the time of it all was a lot long than what we
planned. Because of this we decided to merge some of the other ideas in the
scenes into the other two scenes to cut down on time. If we had not have done
this then the advert would have been extremely hard to follow, and would have
made an unsuccessful advert.
The feedback our group got from our tutor was positive with
the whole idea of the advert and how it was working reasonably well, but with a
few negatives saying how the character could have drunk the drink.

The feedback
from the rest of the class had said that the positives are that it’s a
brilliant idea and it meets its target audience really well. However the
negatives where the quiet sounds of the speaking and the music and also that
there could have been less video transitions.
B. My overall satisfaction for the advert isn’t exactly what
I wanted it to be, most of the scenes had been cut out, making the story and
narrative side of the advert rather difficult to follow, along with it having massive
holes in it. We had found two days before the deadline that the advert as too
long and had a few continuity errors with the way that the main character was
dressed. Because of this we had to re-shoot and then re-edit in that time. I feel
that the last two days before the editing deadline was completed it was rather rushed.
However I am reasonable happy with the finished advert, but I do believe that
it could have been a lot better if we had a little more time.
Thursday, 29 January 2015
Wednesday, 28 January 2015
Premiere Pro Guide
1. To start off make sure that the Apple Mac
computer is turned off. Then Press and hold the alt key.

once you have pushed the on/off button at the back of the Mac.

You will need to keep holding the alt key until this appears.

2. Once the Mac has completed loading you will then
need to log in, with the username of “mediab” and then put the password
in “mediab”. the reason for why you will log on using this instead of your usual username, is so that all of your work for the project is easily located for the editing.

3. Place the SD card in the back of the Mac computer.

however if the mac doesn’t read your SD card then put it in a USB adaptor, and place that in the USB slot at the back of the Mac.


5. Find the work on the SD card named “No Name”. This will be where the videos that you have been out to shot will be located.

6. Once they have been located, you should then create a new folder on the home screen so you are then able to move these video clips to an easy access point on the Mac.

and then name the folder after the project that you are doing, this will help to locate the folder when it is needed.

7. Then open the new folder that you have just created, and then copy over all of the videos/pictures and work from the SD card to the new folder.

8. After all of the work that you need has been copied to the new project folder, close the SD card folder (as it is no longer needed at the time being).

9. Right click the “No Name” and then click “Eject “No Name” and its then safe to be taken out.

10. The next thing to do is to go to the bottom of the screen.

and open Adobe Premiere Pro CC this is where all of the video editing will be happening – if it’s not there,

then you should click “Go” at the top of the left side of the screen, then applications and find “Adobe Premiere Pro CC” then click it again and let it load.


and then just let the software load open. it is advised that you let the software open rather than doing other things at the same time, as doing too much at one time will make it slower to load up.

11. When first starting a new project, click “new project” to start. However if you have already saved a project that you wish to then use then click “open Project” and find your work.


12. Name your new project with the same mane as the folder that you had created earlier. This is also to help locate the project when coming back to finish editing on a later date.


13. Drag the Premiere Pro out to the side, in order to see the project folder, and then bring the videos and other pieces of work that are needed from the new folder on the desk top to “import media” to start. With out doing this it would be very difficult to edit the film.

14. Then drag the video clips on to the timeline to get started.


17. While watching the newly added clip to the time line and you then decide that you do not wish for the beginning, middle or the end part to be there, you are going to want to cut out the part you don’t want. To do this you are going to need the razor tool that is on the left side of the timeline.

18.In order to do this accurately you should watch the video clip and line up the blue vertical line, to where you wish to cut the clip, and then click the mouse key in the left corner of the timeline.


20. At the bottom of the screen is a sliding tool bar that if it has been made smaller then it will zoom in to the timeline to help with more accurate cuts and positioning.
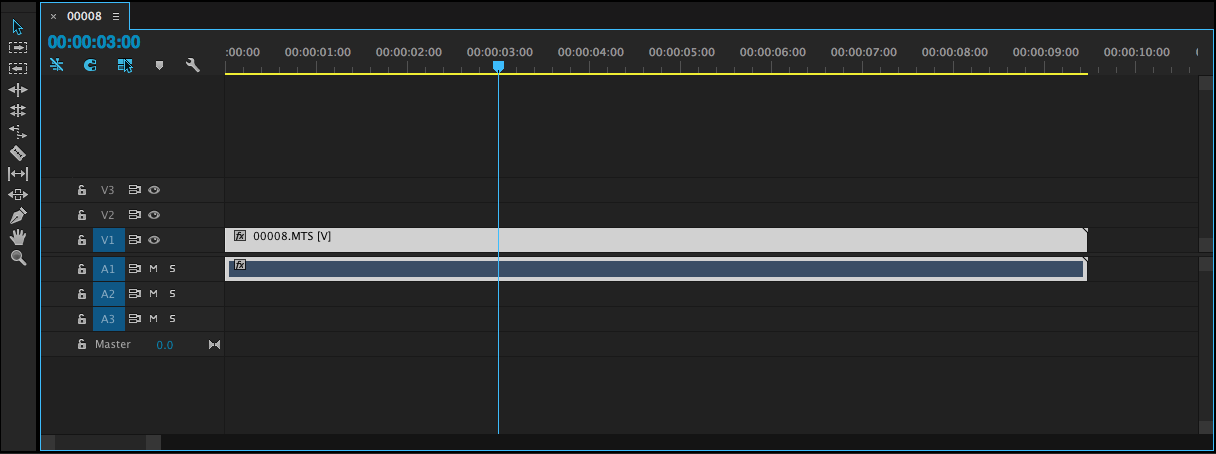
21. And if this bar is to then be stretched going the other way then it will zoom out of the timeline, and this is to help view all of the clip that have been placed on there.

22. Once you have completed your movie and you are ready to export. Go to the top of the screen and click File – Export - Media.


Once this screen as appeared, click the scroll down bar next to format and scroll down to H-264, this is so the film that you have made will be of high quality and apple to play on the normal PC computers, and rename the project and then click export.


And let it load!

Congratulations on completing your movie!!
once you have pushed the on/off button at the back of the Mac.
You will need to keep holding the alt key until this appears.
and then make sure you select the “Macintosh HD”. This is where the media editing software is located
3. Place the SD card in the back of the Mac computer.
however if the mac doesn’t read your SD card then put it in a USB adaptor, and place that in the USB slot at the back of the Mac.
4. Then
the card “No Name” will then appear and then a scanner will then open, and
just let that finish, in order to keep files from corrupting.
5. Find the work on the SD card named “No Name”. This will be where the videos that you have been out to shot will be located.
6. Once they have been located, you should then create a new folder on the home screen so you are then able to move these video clips to an easy access point on the Mac.
and then name the folder after the project that you are doing, this will help to locate the folder when it is needed.
7. Then open the new folder that you have just created, and then copy over all of the videos/pictures and work from the SD card to the new folder.
8. After all of the work that you need has been copied to the new project folder, close the SD card folder (as it is no longer needed at the time being).
9. Right click the “No Name” and then click “Eject “No Name” and its then safe to be taken out.
10. The next thing to do is to go to the bottom of the screen.
then you should click “Go” at the top of the left side of the screen, then applications and find “Adobe Premiere Pro CC” then click it again and let it load.
and then just let the software load open. it is advised that you let the software open rather than doing other things at the same time, as doing too much at one time will make it slower to load up.
11. When first starting a new project, click “new project” to start. However if you have already saved a project that you wish to then use then click “open Project” and find your work.
12. Name your new project with the same mane as the folder that you had created earlier. This is also to help locate the project when coming back to finish editing on a later date.
and it opens.
13. Drag the Premiere Pro out to the side, in order to see the project folder, and then bring the videos and other pieces of work that are needed from the new folder on the desk top to “import media” to start. With out doing this it would be very difficult to edit the film.
14. Then drag the video clips on to the timeline to get started.
15. Make
sure that you keep saving otherwise all of the work that has been created with either be lost or corrupt.

go to file at the top of the screen and click “Save as”.

16. This blue vertical line is used on the timeline to find certain parts of the video to line up accurately, in order to crop. It will move along while you are playing the clips. This is to make sure that the part of the clip that is going to be cut is accurate.
go to file at the top of the screen and click “Save as”.
16. This blue vertical line is used on the timeline to find certain parts of the video to line up accurately, in order to crop. It will move along while you are playing the clips. This is to make sure that the part of the clip that is going to be cut is accurate.
17. While watching the newly added clip to the time line and you then decide that you do not wish for the beginning, middle or the end part to be there, you are going to want to cut out the part you don’t want. To do this you are going to need the razor tool that is on the left side of the timeline.
18.In order to do this accurately you should watch the video clip and line up the blue vertical line, to where you wish to cut the clip, and then click the mouse key in the left corner of the timeline.
19. For
the clip that isn't wanted anymore, then you should right click on the mouse
and then click cut for it to be deleted from your timeline, so that there is going to be no confusion on which part you wanted.
20. At the bottom of the screen is a sliding tool bar that if it has been made smaller then it will zoom in to the timeline to help with more accurate cuts and positioning.
21. And if this bar is to then be stretched going the other way then it will zoom out of the timeline, and this is to help view all of the clip that have been placed on there.
22. Once you have completed your movie and you are ready to export. Go to the top of the screen and click File – Export - Media.
Once this screen as appeared, click the scroll down bar next to format and scroll down to H-264, this is so the film that you have made will be of high quality and apple to play on the normal PC computers, and rename the project and then click export.
And let it load!
Congratulations on completing your movie!!
Subscribe to:
Posts (Atom)