
once you have pushed the on/off button at the back of the Mac.

You will need to keep holding the alt key until this appears.

and then make sure you select the “Macintosh HD”. This is where the media editing software is located

3. Place the SD card in the back of the Mac computer.

however if the mac doesn’t read your SD card then put it in a USB adaptor, and place that in the USB slot at the back of the Mac.

4. Then
the card “No Name” will then appear and then a scanner will then open, and
just let that finish, in order to keep files from corrupting.

5. Find the work on the SD card named “No Name”. This will be where the videos that you have been out to shot will be located.

6. Once they have been located, you should then create a new folder on the home screen so you are then able to move these video clips to an easy access point on the Mac.

and then name the folder after the project that you are doing, this will help to locate the folder when it is needed.

7. Then open the new folder that you have just created, and then copy over all of the videos/pictures and work from the SD card to the new folder.

8. After all of the work that you need has been copied to the new project folder, close the SD card folder (as it is no longer needed at the time being).

9. Right click the “No Name” and then click “Eject “No Name” and its then safe to be taken out.

10. The next thing to do is to go to the bottom of the screen.


then you should click “Go” at the top of the left side of the screen, then applications and find “Adobe Premiere Pro CC” then click it again and let it load.


and then just let the software load open. it is advised that you let the software open rather than doing other things at the same time, as doing too much at one time will make it slower to load up.

11. When first starting a new project, click “new project” to start. However if you have already saved a project that you wish to then use then click “open Project” and find your work.


12. Name your new project with the same mane as the folder that you had created earlier. This is also to help locate the project when coming back to finish editing on a later date.

and it opens.

13. Drag the Premiere Pro out to the side, in order to see the project folder, and then bring the videos and other pieces of work that are needed from the new folder on the desk top to “import media” to start. With out doing this it would be very difficult to edit the film.

14. Then drag the video clips on to the timeline to get started.


15. Make
sure that you keep saving otherwise all of the work that has been created with either be lost or corrupt.

go to file at the top of the screen and click “Save as”.

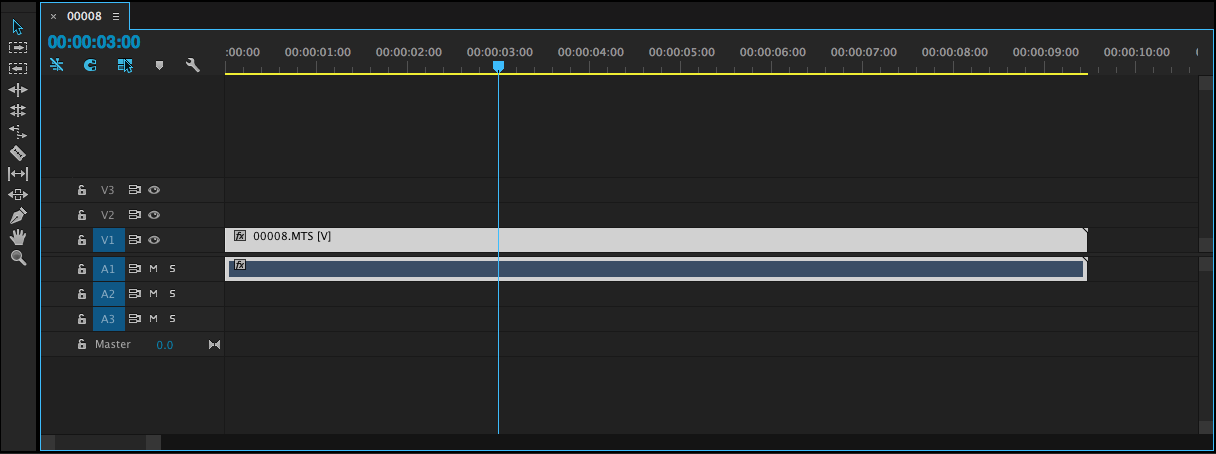
16. This blue vertical line is used on the timeline to find certain parts of the video to line up accurately, in order to crop. It will move along while you are playing the clips. This is to make sure that the part of the clip that is going to be cut is accurate.
go to file at the top of the screen and click “Save as”.
16. This blue vertical line is used on the timeline to find certain parts of the video to line up accurately, in order to crop. It will move along while you are playing the clips. This is to make sure that the part of the clip that is going to be cut is accurate.

17. While watching the newly added clip to the time line and you then decide that you do not wish for the beginning, middle or the end part to be there, you are going to want to cut out the part you don’t want. To do this you are going to need the razor tool that is on the left side of the timeline.

18.In order to do this accurately you should watch the video clip and line up the blue vertical line, to where you wish to cut the clip, and then click the mouse key in the left corner of the timeline.


19. For
the clip that isn't wanted anymore, then you should right click on the mouse
and then click cut for it to be deleted from your timeline, so that there is going to be no confusion on which part you wanted.

20. At the bottom of the screen is a sliding tool bar that if it has been made smaller then it will zoom in to the timeline to help with more accurate cuts and positioning.
21. And if this bar is to then be stretched going the other way then it will zoom out of the timeline, and this is to help view all of the clip that have been placed on there.

22. Once you have completed your movie and you are ready to export. Go to the top of the screen and click File – Export - Media.


Once this screen as appeared, click the scroll down bar next to format and scroll down to H-264, this is so the film that you have made will be of high quality and apple to play on the normal PC computers, and rename the project and then click export.


And let it load!

Congratulations on completing your movie!!
Jade,
ReplyDeleteYou've made a good start here and you have carefully selected relevant screen shots to talk someone through the process. To improve, you need to say WHY; for (almost) each step, you need to say why we do things a certain way, e.g,. why do we use Macs? why do we use Mediaa for example, instead of your user names? Also, mention renaming folders once they are copied and why it is important to do so.
Ellie